


Finally! After two and a half years in the making, my celestial clock is finished. I guess you could call it my Christmas gift to myself:
In following posts, I’ll explain a little bit more about how I designed an built it.
| Celestia |

|
Comments Off on Celestia |
Back in 2005, I created a sort-of industrial art-project in the form of a decorative brass clock. The project introduced me to some rapid-prototyping technologies such as photo-chemical etching and other cool stuff. The question was, what to do next? With the kernel of a good idea but no idea I how to complete it, I embarked on a 2-year project to build a large ( had to be large ), functional, brass celestial clock. Well, its been more than 2 years, but I’ve finally completed it.
The clock is 2-feet by 2-feet in a solid oak case. It display all the major constellations in the Northern Hemisphere visible from 37°.75′, 122°.68′ ( San Francisco ) for any time of day for any day of the year. This is done using two counter-rotating disks. The rear disk displays the constellations ( and date ) and the front disk partially masks the rear disk and marks the time. The time is tracked in a 24-hour format accurate to 5-minutes.
Although it looks as though it might be mechanical, its actually a network enabled robot in the shape of a clock.
The clock gets the time/date from the NIST (National Institute for Standards and Technology) over a WiFi connection. A small microcontroller provides the brains and is connected to stepper-motors, to move the brass disks, and optical sensors, to determine the position of the disks.
The rest is software, much as it should be.
|
|
When I started the project, I had some foggy notion of what I wanted to create (A celestial clock made of brass) but I didn’t have a good idea of what sort of design, style and imagery I wanted to include. So I did some fairly extensive research online into ancient celestial maps, cartography, horology (clock making) and the like.
One of the best references turned out to be the The Australian National University’s ArtServ project You can find some really beautiful hi-res photographs of horological masterpieces here. These clocks are the touchstone.
Another source of inspiration was the Uranographicarum Star Atlas. I spent quite a long time trying to work these ancient engravings into the design of the clock, but to no avail. Instead, I went with a less decorative Planisphere design.
For the unifying design theme of the clock, I considered several different motifs. I spent the better part of a month playing with Celtic knotwork, Celtic knot software and Celtic fonts. In the end, I concluded that the concentric nature of Celtic imagery was too difficult to integrate into the clock, which has a large, asymmetric element at its core.
Instead I started looking at 19th Century industrial design. Steampunk was all the rage, and I found some really good references on 19th Century French Ironwork. 1100 decorative French Ironwork Designs, Treasury of Ironwork Designs and Ornamental Ironwork are excellent references. These books contain hundreds of engravings of 19th century ironwork, used for things such as fences, lamp-posts, and other decorative but functional applications. In the end, I didn’t use any one design verbatim. Rather I attempted to streamline and simplify the designs so they wouldn’t distract from the information the clock was presenting. In particular, I discarded all botanical and human elements. Perhaps there is a bit of Celtic design influence in here, after all.
Finally, I had to find astronomical references for the constellations the clock would display. If I were living at the North Pole, I could have gotten away with having a single brass disk, which rotates once per year. However, as you move South, the section of the Northern Hemisphere that is visible changes. I found an online service called Astronomy In Your Hands that, for a small fee, will generate a Planisphere for your specific Latitude and Longitude. This was the primary reference for most of the stars represented.
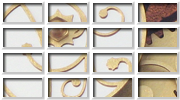
Below are some of the thumbnail sketches from my notebook as I tossed around various designs ideas for the clock:


")


|
|
The most prominent feature of the clock is the filigreed brass metalwork. The brass parts are both functional and decorative. The two large counter-rotating disks which display the date and time are actually giant gears. Hidden behind the 4 decorative corner-plates are smaller brass gears which mesh with and drive the date and time gears. Covering the silver corner-plates are brass grilles which are purely decorative.
To cut and etch the metalwork, I had several options. I could have used laser-cutting, CNC machining or Photo-Chemical etching. Due to the large size and amount of detail, I went with Photo-Chemical Machining (PCM).
Photo-Chemical Machining is a process similar to the process used to etch the copper surface of printed circuit boards. A resist mask is created photographically from artwork and applied to the metal. Then the metal is placed in a chemical bath which selectively dissolves the exposed metal. You can achieve a stunning level of detail using PCM.
However, unlike the inimitable Jake Von Slatt, I didn’t have a large workshop where I could safely mix large vats of Copper Sulfate (such is life in a studio apartment). So, I took the easy way out and used a fabrication service called Acu-Line Etch. I had a good experience with them on a smaller, simpler project and they came through for me again. Acu-Line uses Photo-Chemical Machining to cut, etch and chemically darken brass and copper sheet metal directly from a digital file. They also applied a brushed metal effect ( using an actual brush, I think ) and a clear lacquer to help prevent tarnishing. It turns out the brushed-metal effect was very important, as it hid imperfections in the metal and made the metal literally sparkle in the sunlight.
Not insignificantly, they can also apply a chemical darkening to the etched areas which I used to blacken the printed text. This saved me from having to print the lettering on the brass in a second pass or from darkening the metal somehow myself. It also proved to be a serious design constraint, as they can only darken copper alloys. My original design incorporated a stainless-steel disk displaying the constellations. In the end I compromised by using the brushed stainless steel only for unprinted elements.
Probably the biggest challenge I had in creating the artwork for the brass components was generating the involute gear profiles for the large and small gears. If I didn’t get the math right, the gears wouldn’t mesh correctly. Also, because I was using Adobe Illustrator to create the artwork, I somehow needed to get the outline of the gears imported to Illustrator as a single polyline.
Lets just say my solution was less-than-optimal.
I found that the free CAD program from E Machine Shop has a feature for generating involute gears which you can export to Autocad format. Converting the DXF file into a usable Illustrator file is a long, sad story involving multiple conversion programs and some hand-made Perl scripts.
Suffice to say, next time I’ll use a commercial CAD program.
Here are some low-res images of the artwork which shows the layout of the brass parts and some close-ups on the brass parts themselves.


|
|
This project was my first foray into laser cutting.
I had been warned against placing galvanically incompatible metals in contact with each other, so I opted to do away with the stainless steel elements all together. This opened up the possibility of using less-expensive laser-cutting of faux-steel rather than the more-expensive PCM cutting of actual steel.
I used a laser-cutting service called Custom Laser Cutting and had them cut sheet acrylic with a faux metal finish. I also used them to cut plastic side-walls for the small brass gears which drive and suspend the large time and date disks.
The faux stainless steel elements turned out great. The side-wall disks not-so-much. The problem is that the disks are made of ABS plastic, which is super strong but slightly flexible. Next time I’ll make them out of a thicker, more rigid material. Live and learn.
I can’t say enough good things about Custom Laser Cutting. They got everything right on the first try and called me up to make sure I had received my shipment promptly. I hope they survive the coming shakedown in web-based manufacturing services. Companies like ponoko are going to give the little guys a run for their money.


|
|
Here is a list of some of the off-the-shelf parts and service companies that went into the construction of the clock:
| Aculine Etch | Acu-Line Etch is the service I used to Photo-chemically machine the brass metalwork. They produce precision machined parts for industry, but they work with artists as well. | |
| Custom Laser Cutting | I used Custom Laser Cutting to cut the faux-silver decorative parts and some of the hidden structural parts. Their customer service was very good. | |

|
Make Controller | This is the micro-controller used to power the clock. |

|
Anaheim Automation Servo | This is one of the stepper motors used to power the clock from Anaheim Automation. The part number is TGM24-056-19-5V-020A-64R-LW4 |

|
Phidgets Sensor Cable | These connect the Phidgets Analog sensors to the microcontroller. You can find them all over the web. |

|
Phidgets Reflective Sensor | I got mine from Trossen Robotics. I tore it apart and combined it with a IR transmissive sensor, below. |

|
Jameco Transmissive Opto-Sensor | This is an IR LED emitter and detector in a single package. I combined it with the phidgets Reflective Sensor, above. |

|
Trossen Robotics Bearing Block | This is a precision bearing used to mount the rear clock disk. Highly recommended. |

|
DLink DAP-1522 WiFi Bridge | This is an 802.11N wireless access point/bridge. I plug the Make Controller into this to provide Internet Connectivity to the clock. There are MUCH cheaper solutions than this. |
|
|